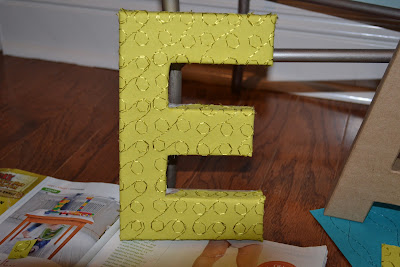
It's not even been a week since my last craft tutorial, but I feel it's been too long! So here's another recent craft I did, as well as how I did it!
We've all seen the paper or fabric covered letters before, especially in kid's rooms, and I wanted to get some for Eli and Asher. I wanted to take the easy way out and grab them off of Etsy, but I wasn't seeing what I wanted so I took a trip to Hobby Lobby, picked my own supplies, and in the end I got just what I wanted!
1. To start, you'll need these supplies: kraft letters from Hobby Lobby, scrapbook paper of choice, mod podge, brush, ribbon (sides are 1" but i used 7/8" ribbon and it's fine), and hot glue. (For my letters, I found a weird product in the paper section at hobby lobby that's like a soft paper, so it's almost like thick fabric. That's how I got the stitch detail in mine; the "paper" came like that).
2. Use your brush to put a nice coat of mod podge on the top and sides of your letter. Press your entire sheet of paper flat on top of your letter.
3. Turn your letter over, trim excess paper, and cut slits and notches where the paper will need to fold over the edges of your letter.
4. Fold edges up, press, and hold for a few seconds to help them stay in place.
5. Pretty soon your letter will look like this!
6. For a more finished edge and a little more fun, add ribbon to the sides of your letter using hot glue. 1 inch ribbon may work best for these particular letters, but I couldn't find any and used 7/8." You can see a bit of the brown near the back of the letter where it doesn't completely cover, but you have to be really looking hard, and it's not a big deal :)
7. Done!! Check em out!!
Like what you see? I'll gladly take custom orders for cute letter(s) for your kids' rooms or any room in your house! (I have letters that spell "love" in my kitchen!) Just e-mail me at bhiggi5@tigers.lsu.edu. $10/letter.
-BETH
Ps. These letters are for the boys' closet, which is a whole 'nother project in itself! Watch for that blog post soon :)


No comments:
Post a Comment